Guide to Building a Basic Network
Building a home or small business network or LAN is one of the simplest
tasks when working with PCs. So, do not make it more complicated
than it needs. You can buy the few components you will need either
separately or in a kit form. You will save money buy shopping
around for the components separately. The kits will come with
complete instructions for the first time network builder. This
is a choice for you to make.
Let's discuss the few items you will need to start:
1) Hub
2) Network Adapter Card for each computer
3) Cables to run from each computer to the Hub
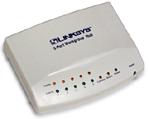
The Hub
Hubs are the basic connector for a network, as a junction for the
computers to connect together. If all the cards are the same speed,
10Mbps vs 10/100Mbps cards, buying a simple hub to match their speed
is ideal and most economical. If the cards pre-exited in the computers
and were mismatched in speed, you should use a switch, a device that
allows the faster cards to continue to communicate at the highest speed
and not slowed by the slower card. Today, hubs are very inexpensive
and the price of switches has fallen dramatically. (under $50 for a
5port hub and under $100 for a 5port switch).
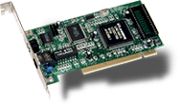
The Network Adaptor cards
Although you will find older 10mb network cards around in the $15
price range, they are almost always ISA slot cards. I highly recommend
you use 10/100Mbps network cards, now in the under $30 range and they
are usually PCI cards, which dramatically increases data transfer speeds
and performance.
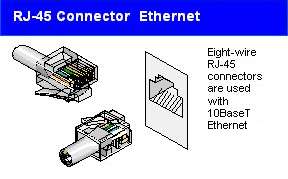
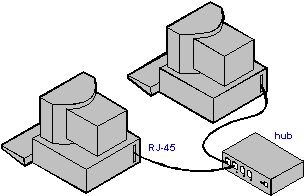
The Cabling
Nearly all hubs and Network cards sold today are what is often called
10base-T or 100base-T. That simply means you use cables called Cat5,
(sometimes called "twisted pair")... they have connector ends
on them that resemble a telephone connector. The telephone connector
is actually smaller, called a RJ-11 connector, while a 10base-T connector
is an RJ-45. But, they are nearly alike, except for size.
Installation
All you do is install the network cards into each computer, along with
required drivers for the operating system. The drivers will be included
with the Network Adaptor card or they can be downloaded from the manufacturer's
web site. Windows95/98 makes the installation of these drivers
simple. Then, plug in an appropriate length cable to the hub,
then cables out from the other two computers to the hub. Remember
that if you are using a hub that you do not want a "cross-pin" or "cross-over"
cable. These are special cables used to connect two computers
without a hub. Typically the cable you require is a "patch" cable.
This is all very simple, so do not make it too complicated.
Software
The only thing left to do is setup the software to let the computers
communication. If you are using Windows95 or 98, this is real simple.
On each computer, go to Start/Settings/Control Panel and double click
on the Network icon. Click on the tab at the top that says: "Identification."
In these boxes you distinguish each computer on the network. The top
box, Computer name should be different on each computer, (for our purposes
we will call each computer one, two and three, respectively). The Workgroup
must be the same on each computer and you can use anything...
"Workgroup" is default. The bottom box, computer description is not
really important, but you must have something in the box.
Next, click on the "Configuration" tab at the top. You will need
to click on the ADD button and then double click on Protocol.
On the right side choose, "Microsoft" and then on the left side choose
"NETBEUI." Now, the network driver has been installed. Now,
click on the button in the middle of the window that says, "File and
Print Sharing." Click on each one so that a check mark appears in front
of each. Your network drivers are installed. Click the OKAY button.
The computer will want to restart, allow this to occur by clicking on
the Okay button that appeared.
Now, when the computer is restarted, double click on the MY Computer
icon on the desktop. Right click on the "C" drive icon and click SHARING.
Check the "Share As" button and check the share type as: FULL. Now click
on OKAY. These steps are important on each computer. It is the same
except for setting the Computer name, which is different for each computer.
The only thing left is to map the drives on each computer. This is
done so each computer knows where to find the hard drives on the other
systems. Open Windows Explorer. Click TOOLS on the upper toolbar, then
map network drive. In the box provided, in the window listed as PATH,
you need to describe the path to the hard drives on the other computers.
Say that all computers have been setup now, you only need to type this
in to the computer named "one": \\two\c This
tells computer ONE that computer TWO "\\two" has a hard drive "C" at
\c or: \\two\c
You repeat this on TWO to find the hard drive on ONE, with this line:
\\one\c and of course it works the same on THREE.